Create a custom filter
The Filter section of the tool ribbon provides an option to create your own filter. You can create a filter and use it once, or save it to use over and over again. From the Filter section, you can also modify a filter to update it, or delete a filter when you no longer have any use for it.
Tip
For specific examples on creating filters click here. The same method applies to both My Time and My Expenses, only the available fields and conditions are different.
To create a custom filter:
-
Select My Time or My Expenses from the My Transactions window.
-
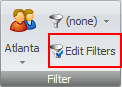
Click on Edit Filters in the Filter section of the tool ribbon.
The Edit Filters window opens.
-
Click New Item
 on the toolbar, to start a new filter.
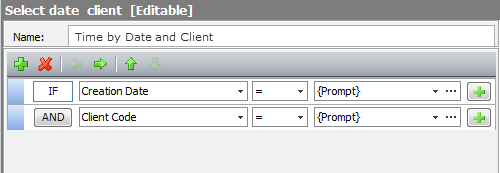
A < New Filter > [Editable] pane displays.
If this is the first time you are creating a filter, you can skip this step, as the pane is already displayed.
-
In the Name text box, type a name for your custom filter.
Every condition begins with an IF statement, so the first rule text box is already defined for you.
- Click the operandarrow and select the operand you want to use.
-
Click the criteriaarrow and select a variable, or click the ellipses button to type in a specific value.
Note
Selecting {Prompt} lets you manually enter criteria when the filter is used. For example, if you select 'Creation Date' and {Prompt}, you have the opportunity to enter the date when using the filter, as opposed to using the ellipses button to select a set date that cannot be changed.
-
(Optional) Click the green plus button if you want to create another condition, and then repeat steps 5 and 6. (To remove a condition, click on it and then click the red X button in the filter tool bar.)
The default rule operand for additional conditions is AND, but you can change it to OR by clicking the AND button.
-
Repeat steps 5 through 6 for each condition you want to set.

-
When finished, click the Published arrow and select how you want to publish the filter. Options are:
- Publish Item to Employee - the filter can be seen and used by only the employee(s) you designate.
- Publish Item to Team - the filter can be seen and used by the entire team.
- Unpublish Item - this option is only used when you want to delete a saved custom filter.
-
Select the team or employees who you want to grant access to, and move them to the Publish to Team or Publish to Employee side of the window.

- Click the Save button in the Publish to... window.
- Click the Save button on the Edit Filters... toolbar to save the filter.
-
Click the Close button in the top right corner of the Edit Filters... window.
The filter is now available from the Filters selection button. (See example below.)
