Edit a custom filter
Once you have saved a custom filter, it is available in the filter section of the tool ribbon. Any filters available under the filters list can be modified as necessary.
To edit a saved custom filter:
-
Select My Time or My Expenses from the My Transactions window.
-
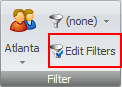
Click on Edit Filters in the Filter section of the tool ribbon.
The Edit Filters window opens.

- Click on the filter you need to edit, to select it.
- Make your changes.
-
When finished, click the Published arrow and select how you want to publish the filter. Options are:
- Publish Item to Employee - the filter can be seen and used by only the employee(s) you designate.
- Publish Item to Team - the filter can be seen and used by the entire team.
- Unpublish Item - this option is only used when you want to delete a saved custom filter.
-
Select the team or employees who you want to grant access to, and move them to the Publish to Team or Publish to Employee side of the window.

- Click the Save button in the Publish to... window.
- Click the Save button on the Edit Filters... toolbar to save the filter.
-
Click the Close button in the top right corner of the Edit Filters... window.
The updated filter is now available from the Filters selection button. (See example below.)
