Create a Custom Filter
The Filter section of the tool ribbon provides an option to create your own filter. You can create a filter and use it once, or save it to use over and over again. From the Filter section, you can also modify a filter to update it, or delete a filter when you no longer have any use for it.
TIP: For specific examples on creating filters click here. The same method applies to both My Time and My Expenses, only the available fields and conditions are different.
To create a custom filter:
-
Select My Time or My Expenses from the My Transactions window.
-
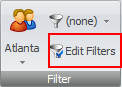
Click on Edit Filters in the Filter section of the tool ribbon.
The Edit Filters window opens.
-
Click New Item
 on the toolbar to start a new filter.
A < New Filter > [Editable] pane displays.
If this is the first time you are creating a filter, you can skip this step, as the pane is already displayed.
-
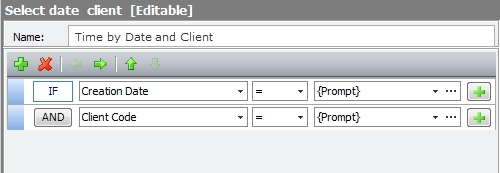
In the Name text box, type a name for your custom filter.
Every condition begins with an IF statement, so the first rule text box is already defined for you.
- Click the operandarrow and select the operand you want to use.
-
Click the criteriaarrow and select a variable, or click the ellipses button to type in a specific value.
NOTE: Selecting {Prompt} lets you manually enter criteria when the filter is used. For example, if you select 'Creation Date' and {Prompt}, you have the opportunity to enter the date when using the filter, as opposed to using the ellipses button to select a set date that cannot be changed.
-
Optionally, click the green plus button if you want to create another condition, and then repeat steps 5 and 6. (To remove a condition, click on it and then click the red X button in the filter tool bar.)
The default rule operand for additional conditions is AND, but you can change it to OR by clicking the AND button.
-
Repeat steps 5 through 6 for each condition you want to set.

-
When finished, click the Published arrow and select how you want to publish the filter. Options are:
- Publish Item to Employee - the filter can be seen and used by only the employee(s) you designate.
- Publish Item to Team - the filter can be seen and used by the entire team.
- Unpublish Item - this option is only used when you want to delete a saved custom filter.
-
Select the team or employees who you want to grant access to, and move them to the Publish to Team or Publish to Employee side of the window.
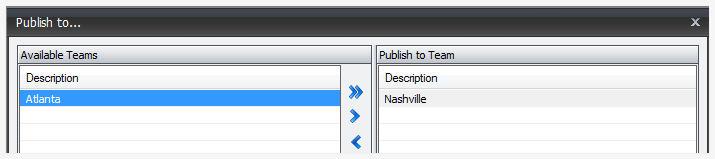
- Click the Save button in the Publish to... window.
- Click the Save button on the Edit Filters... toolbar to save the filter.
-
Click the Close button in the top right corner of the Edit Filters... window.
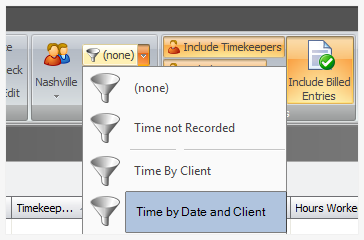
The filter is now available from the Filters selection button. (See example below.)