WIP Transfer
Note: You must be on version 2.35 or higher to have the function to WIP Transfer to an Open Prebill.
WIP Transfer, (Work in Process Transfer) allows a firm to reassign a time or expense record on a prebill from one Client/Matter to a different Client/Matter. At the time of the transfer, the user can elect to transfer that item to an open prebill. The user can also elect to transfer that item back to work in process for the transfer-to Client/Matter, where it will remain waiting to be included in the next prebill selection. Review Table 1.0 for WIP Transfer scenarios.
| Scenario | Option Selected | System Behavior |
| Open Prebill Exists for the Transfer to Client/Matter | Transfer to Open Prebill | Item(s) are moved to the open prebill. Sorting of the prebill or drag-and-drop of the entries may be required to locate them in the prebill. |
| Open Prebill exists for the Transfer to Client/Matter, but the Prebill is locked or open by another user. | Transfer to Open Prebill | System warns that the item(s) cannot be placed on the prebill. The user can Cancel or Continue the transfer, placing the item(s) in WIP instead of on the open prebill. |
| Open Prebill exists for the Transfer to Client/Matter | Transfer to WIP | Items(s) are moved to WIP to be included in the next appropriate prebill selection. |
| Open Prebill exists for the Transfer To Client/Matter, but the Prebill is locked or open by another user. | Transfer to WIP | Items(s) are moved to WIP to be included in the next appropriate prebill selection. |
| Open Prebill does not exist for the Transfer to Client/Matter | Transfer to WIP | Item(s) are moved to WIP to be included in the next appropriate prebill selection. |
Tip: When an item is transferred to an existing prebill, it does not get inserted in date order of the entry. If date order is important to your firm, you will need to perform a quick Sort by Date after the transfer.
To perform a WIP Transfer to another Prebill, perform the following:
- Select Juris>Billing>Edit Prebills. See Figure 1.0
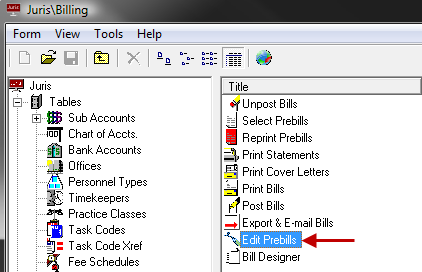 Figure 1.0
 - Select the appropriate Prebill. See Figure 2.0
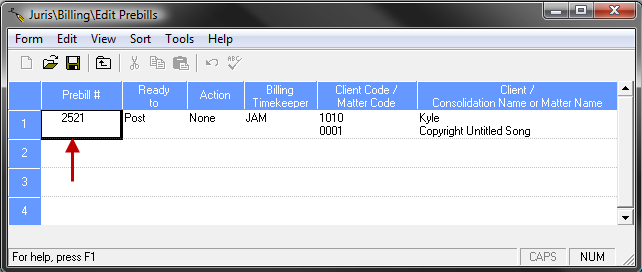 Figure 2.0
 - Select Form>Open or click the Open icon to view the Prebill.
- Select the appropriate line item within the Prebill, perform a right mouse click and select WIP Transfer. See Figure 3.0
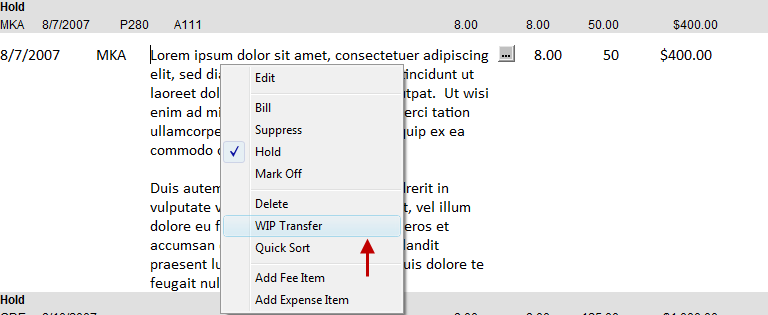 Figure 3.0
 - Enter the Client/Matter. You can click the ellipses button to bring up the Client/Matter finder. See Figure 4.0 and 4.1
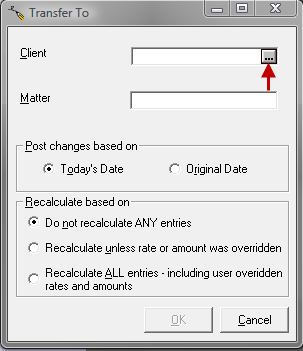 Figure 4.0
 Figure 4.1
 - Click the OK button to confirm the transfer. See Figure 5.0
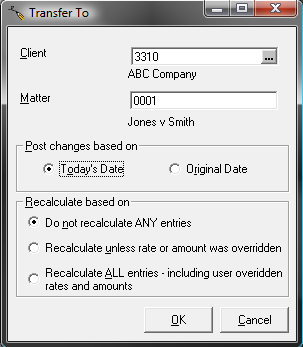 Figure 5.0
 - Click the Yes button on the warning window. See Figure 6.0
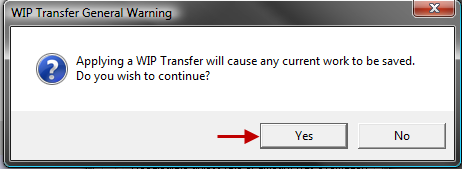 Figure 6.0
 - At the prompt, click the Yes button to add the entry to the existing Prebill. See Figure 7.0
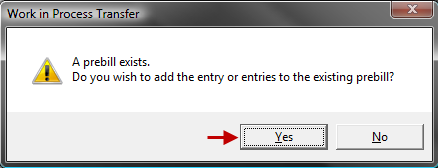 Figure 7.0
 - The item will be removed from the list.