Juris Client Auto Update
Note: You will need folder creation privileges for the following process.
To initialize the Juris Client Auto Update feature, the Juris Application x.xx.exe (x.xx represents the Juris release number) file must be placed in the Juris Shared Folder and the Juris.ini file must include the location of the Juris Shared Folder.
Perform the following steps to utilize the Juris Client Auto Update feature:
- Browse to the Juris License Shared Folder. If you do not know the location, it can be found by opening the Juris License Manager; Start>All Programs>Juris>License Manager.
- Select the database to reveal the Shared Path. Note the location.
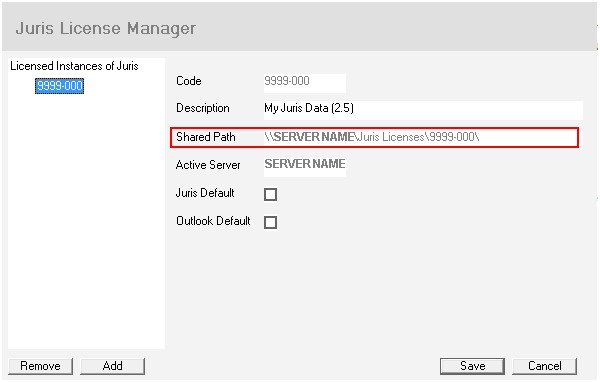
Note: The shared path may differ from the one shown in the image above due to your firm's server name.
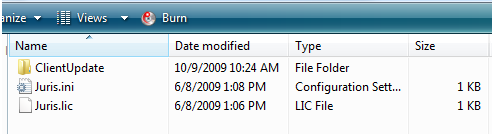
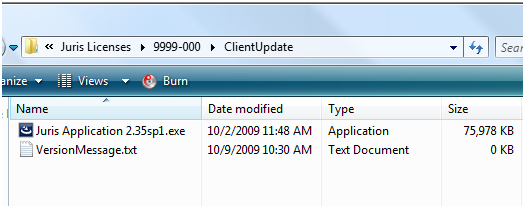
- Browse to the shared folder location and create a new folder named 'Client Update'. The new folder location would be: \\servername\Juris Licenses\Shared Folder\Client Update.
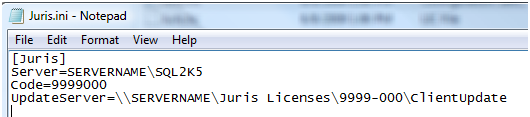
- Edit the Juris.ini file in the shared folder.
- Perform a right mouse click and select Edit. This will open the file in Notepad.
- Enter the location of the Juris Shared Folder. Use a UNC path for the server location. Enter the value 'UpdateServer=\\servername\Juris Shared Folder\Client Update' where servername is the name of your firm's server.
- Select File>Save.
- Close Notepad.
Note: The UpdateServer path must be accessible to all client workstations.
The path should be in Universal Naming Convention (UNC) format (leading double-backslash)
The path must include the ClientUpdate folder with no trailing backslash.
- Place the Juris Application x.xx.exe (x.xx represents the Juris release number) file in Client Update shared folder.
- Launch your current version of Juris on a client PC and login. An Upgrade Notification window with a mismatch message will appear.
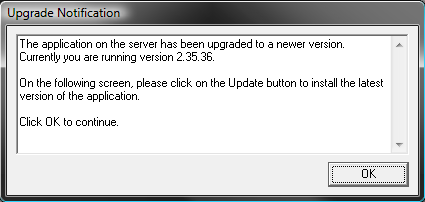
- Click the OK button.
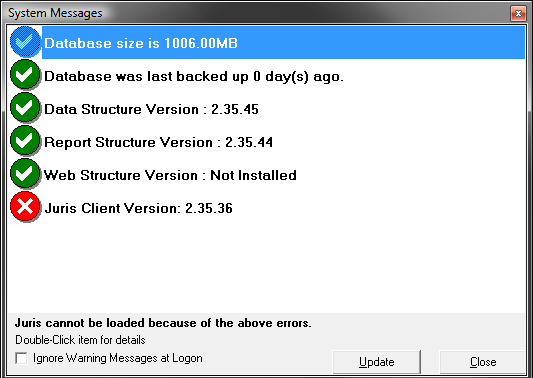
- On the System Messages window, click the Update button.
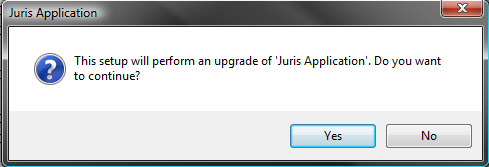
- Click the Yes button on the Juris Application window to perform the upgrade.
- Click the Next button on the installation window.
- You may see a File in Use window. Select the appropriate choice and click the OK button.

Note: Not all files may close and a secondary window may appear. If the secondary window appears, select the Ignore button and complete the installation.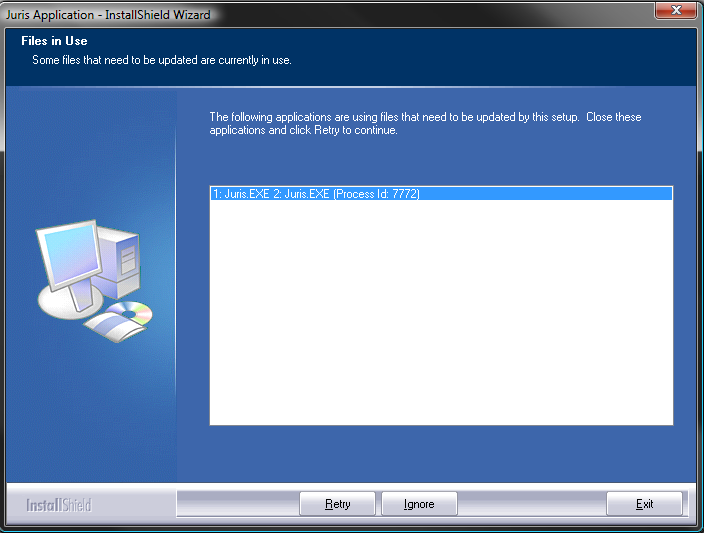
- Click the Finish button to reboot the PC.

- Install the Administrative Tool Kit.