Design a custom bill with Bill Designer
Note
The methods listed below are components that can be used. Not every type will be used. The task below simply shows how you can use the tool set to create a custom Bill.
Tip
Open an existing bill format to see how it was created. View the properties of the fields to get an overview of how they function.
To design a custom bill:
-
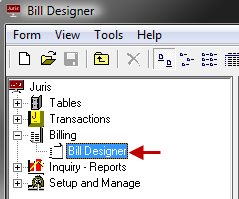
Select Billing > Bill Designer.
-
Do one of the following:
- Double-click an existing format to open it for editing.
-
Click the New icon on the toolbar to start a new format.
Alternatively, you can select Form > New > Bill Designer from the toolbar.
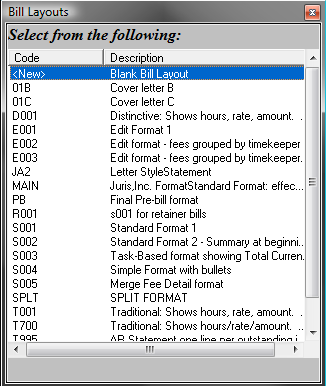
The Bill Layouts window opens.
-
Select New > Blank Bill Layout to begin designing a format from scratch, or select any other format from the list to begin designing a new format based on that existing format.
A new bill layout opens.
-
Name and save the format before proceeding with the design.
Tip
Save often when working on any Bill Design. The undo feature does undo every action since the last save was performed, so make sure to review and save the design periodically as objects are integrated.
-
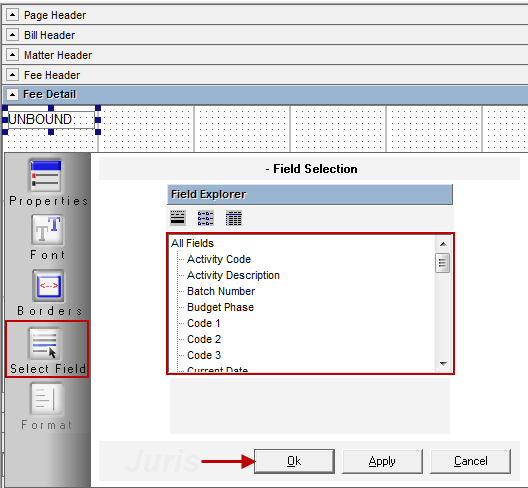
Add a Data Field:
- Click and drag the item into the design from the field explorer, or click the Data Field button and draw an unbound data object in the designer by clicking and dragging a square in the format designer
-
Then select the appropriate data field by right clicking on that object and choosing Properties > Select Field.
To remove the data field, select the field and press the Delete key.
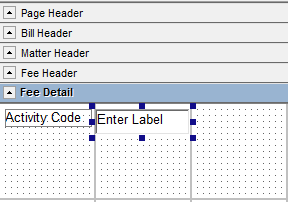
- Click the Label Field
 button to add a label field, and then click and drag a square in the
format designer to draw the label.
button to add a label field, and then click and drag a square in the
format designer to draw the label. -
Double-click on the label field and type the label text within the Caption.
The Label can be removed by selecting the field and pressing the Delete key on your keyboard.
-
Click the Image Field
 button to add an image field, and then click and drag a square in the format designer.
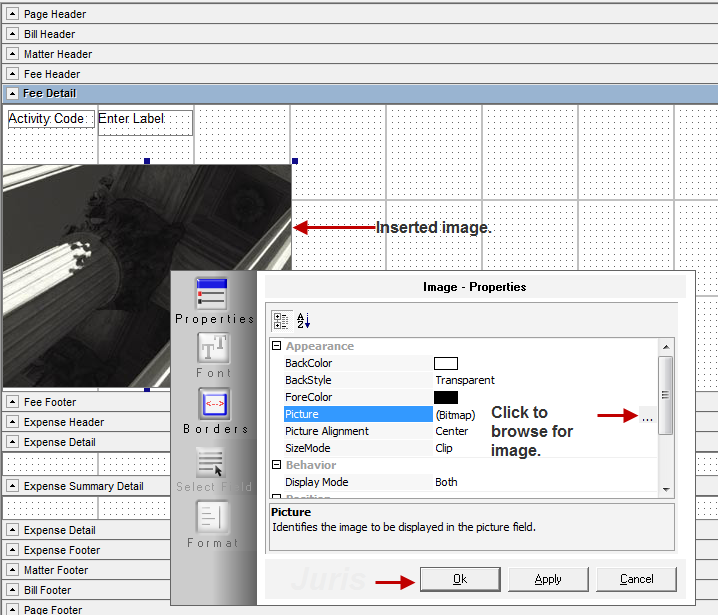
- Right-click on the image field and choose Properties to access the Picture property.
-
Click the Lookup button in the Picture property and Browse to the appropriate graphic.
The image can be removed by selecting the field and pressing the Delete button on the keyboard.
-
Click the Page Break
 button to add a page break, and then click on the location in the format designer where you want the page break.
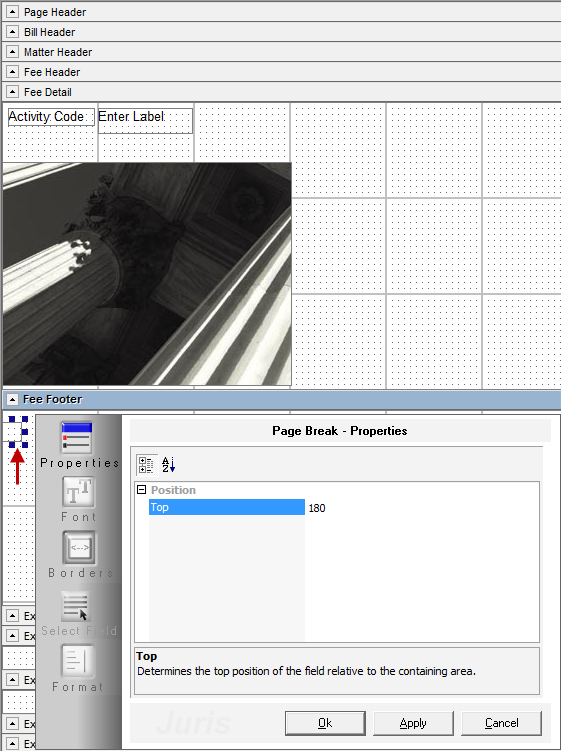
The page break appears as a square object in the left margin.
The Page Break can be removed by selecting the page break object and pressing the Delete key on your keyboard.
-
Click the Shape
 button to add a shape, and then click and drag a square in the
format design.
button to add a shape, and then click and drag a square in the
format design. 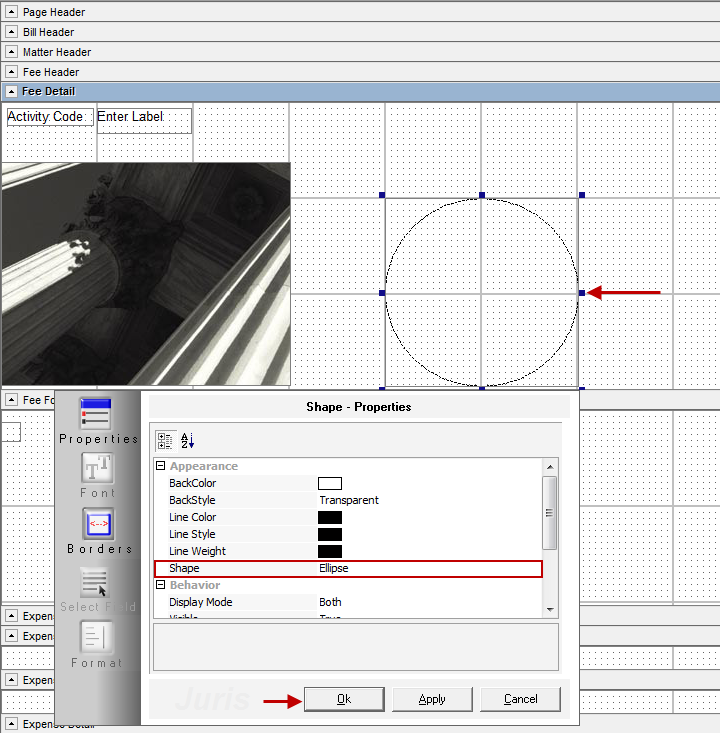
-
Right-click on the shape field and choose Properties to select the appropriate shape (square, rectangle or ellipse) as well as other shape properties (color, orientation, etc).
The shape can be removed by selecting the field and pressing the Delete button on the keyboard.
-
Right-click on the Bill Formattab and select the attachment type you want to add (cover page, banner page, envelope, etc.)
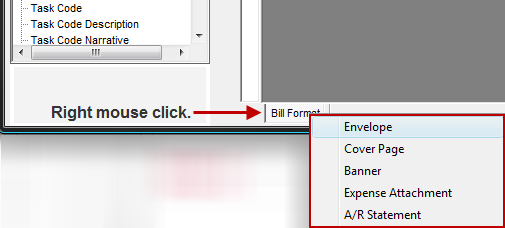
Design the attachment following the same guidelines as designing a bill format.
To remove the attachment, right-click anywhere within the attachment and select Layout > Delete.
-
To add a Subsection, right-click on an area in the design where the subsection should be inserted, choose Insert Section, then select the appropriate subsection.
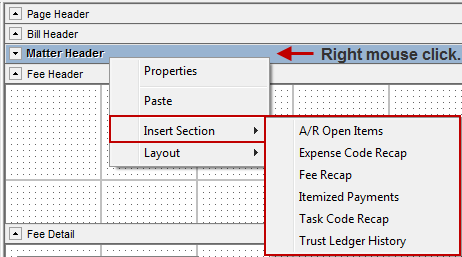
The subsection can be removed by going to the As Fields view, then selecting the field that represents that subsection and pressing the Delete key.
- Format the Layout Properties:
- Select File > Properties from the menu.
-
Right-click within any blank area of the format and select Layout > Properties.
-
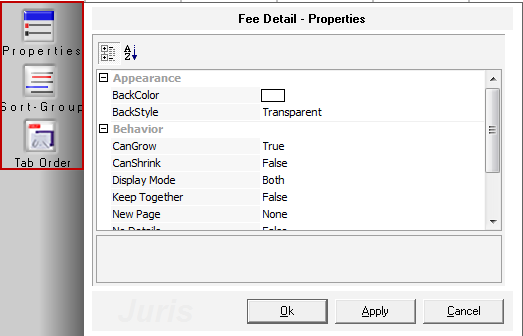
Format the Section/Subsection Properties:
- Right-click within any blank area of the section or subsection and select Properties.
-
Right-click on the Section Delimiter Bar for the section and select Properties.
-
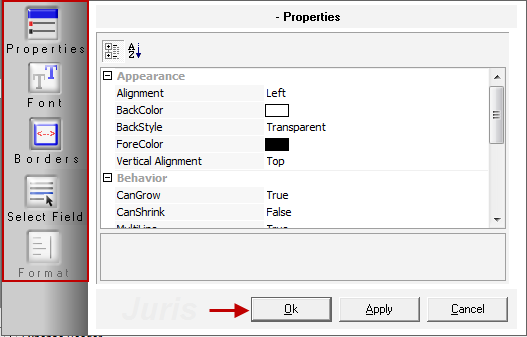
Format the Field Properties by right-clicking on the field and selecting Properties.
Tip
Use all of the property features within an area to customize the Bill Format. Look at the Property Values of an existing Juris Bill Format to learn more about creating a new one. Use the Preview button frequently to view the Bill Format as you create it.