Back up and restore Juris SQL database
There are several tools that can be used to backup the Juris databases. However, in this document, we cover only the Juris Management Console backup and restore procedures. For more information regarding the other software packages, please see the Backing Up and Restoring the Juris SQL Database article on the Juris Support Center.
Backup Juris SQL database
To back up the Juris SQL database:
- Verify that all users have closed out of Juris.
- Click the Windows Start button.
- Select Start > Programs or All Programs in Windows 7.
-
Select Juris > Administrative Tools > Juris Management Console, to open the console.
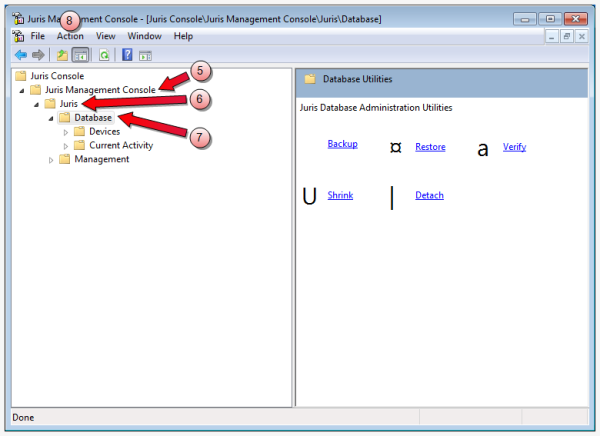
- Double-click Juris Management Console, to expand the folder.
- Double-click [your firm's name] to expand the folder.
- Click the Database folder, to select it.
-
Select Action > All Tasks > Backup on the menu, to open the Juris Backup wizard.
Tip
If you save to the same device and file every time, and do not want to enter a different file name, you can simply click on the Backup link (or icon) in the Database Utilities pane (the right pane,) and then go directly to step 14 to start the backup.
-
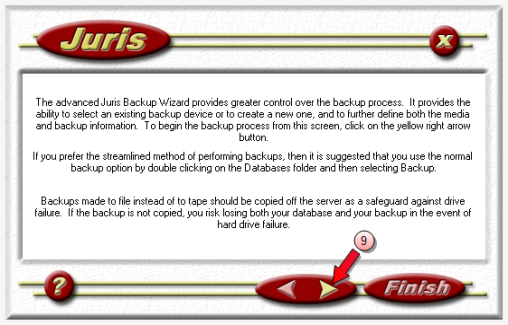
Click the right arrow to display backup device information.
-
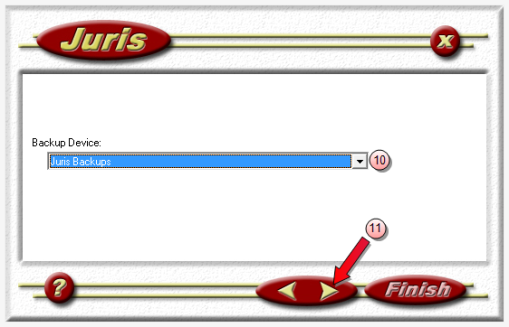
Click the Backup Device arrow, and select the device to which you want to back up.
Important!
If you have not yet setup a backup device, you need to do so before you can continue with step 11.
 Setup backup device steps
-
Click the Backup Device arrow and select New Backup Device from the list.
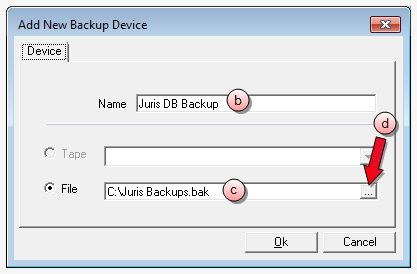
The Add New Backup Device window opens.
-
In the Name box, type a name for your backup. It is suggested that you add the day and/or date to the name for easier identification.
- Select the File option to enter a destination path where you want to save your backup.
-
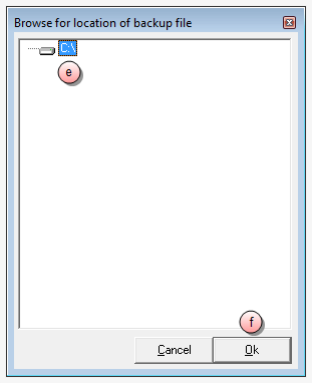
Click the ... (ellipse) button to open the Browse for location of backup file window.
- Browse to and select the folder in which you want to save your backup.
-
Click OK.
You are returned to the Add New Backup Device window.
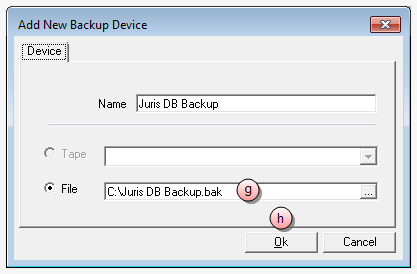
-
In the File box, at the end of the file folder path, type a back up file name and add .bak to it.
Note
Do not place a space between the file name and the .bak extension.
Adding .bak identifies the files as a "back up" file to the Juris Management Console, should you have to restore from this back up.
-
Click OK.
You are returned to the Backup Device window in the wizard.
-
-
Click the right arrow button to display media information.
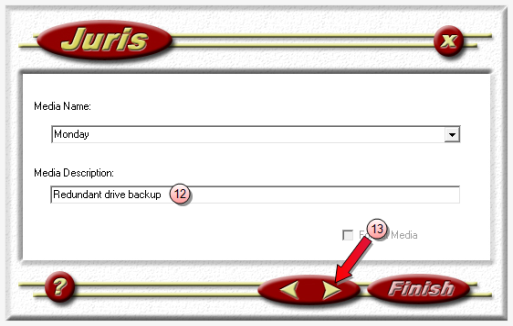
Note
The Media Name box is automatically populated from the Windows System Clock. Please do not change the default..
- In the Media Description box, accept the default, or type a short description.
-
Click the right arrow button to display the Backup information.
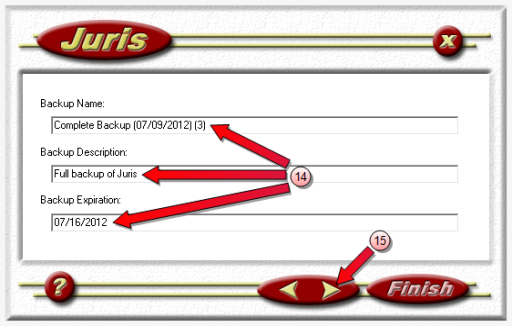
- Optional) Make changes to Backup Name, Backup Description and/or Backup Expiration Date.
-
When done, click the right arrow once to display the Backup Confirmation listing.
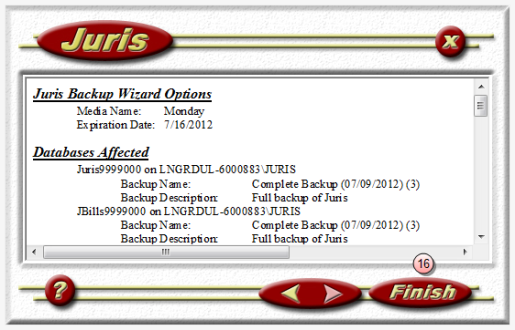
- Click Finish, to start the backup.
-
Click the window Close button, to close the Juris Management Objects window.
You have the option of changing the Backup Name, Backup Description and/or Backup Expiration Date at this point.
When the backup is finished, you receive notification via a report in the Juris Management Objects window.
Note
If you backup to a file, the file should be copied or moved onto a tape, CD, or other removable media to protect yourself in the event of a hard drive failure. Once the backup file has been copied to other media, the file residing on the server must be deleted before the next backup can be performed successfully.
Restore Juris SQL database
To restore the Juris SQL database:
- Verify that all users have closed out of Juris.
- Click the Windows Start button.
- Select Start > Programs or All Programs in Windows 7.
-
Select Juris > Administrative Tools > Juris Management Console, to open the console.
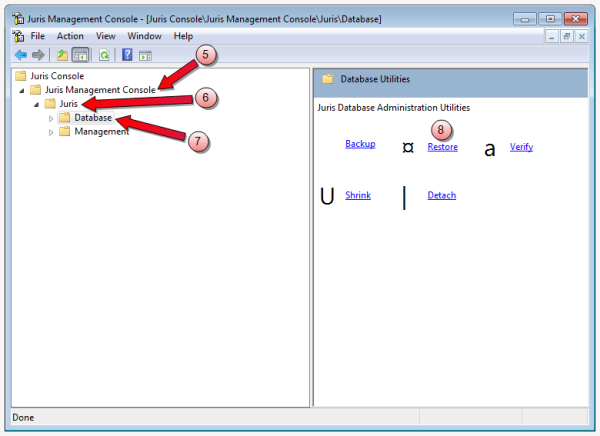
- Double-click Juris Management Console, to expand the folder.
- Double-click [your firm's name] to expand the folder.
- Double-click Database to display the Database Utilities in the pane on the right.
-
Click Restore in the right pane, to open the Juris Restore wizard.
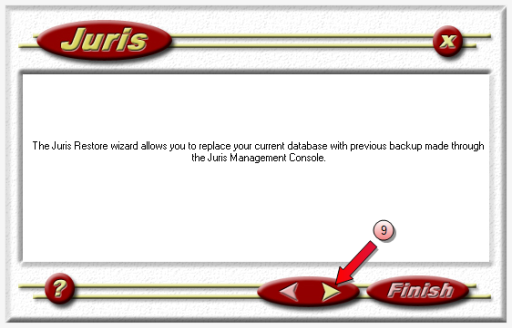
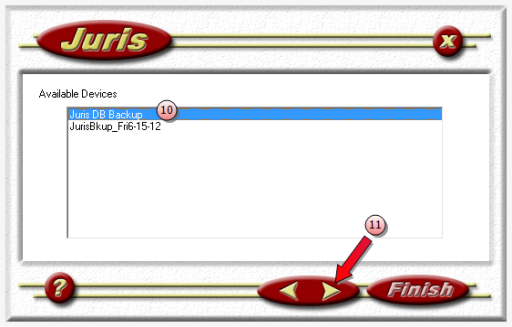
- Click the right arrow button to display the Available Devices information.
- Click the backup device you want to restore from, to select it.
-
Click the right arrow button to display the Available Media Sets information.
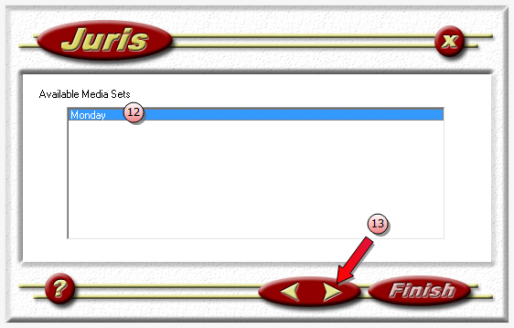
- Click the media set you want to restore from, to select it.
-
Click the right arrow button to display the Available Backup Sets information.
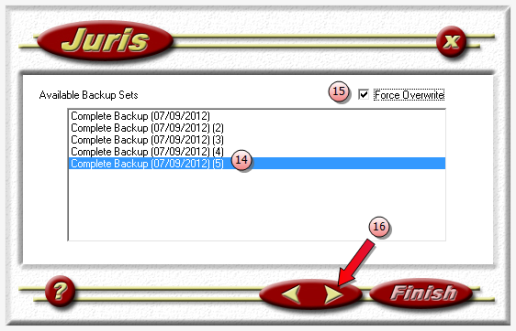
- Click the backup set you want to restore, to select it.
- Select the Force Overwrite check box, if you want to overwrite the current Juris data.
-
Click the right arrow button to display the restore confirmation listing.
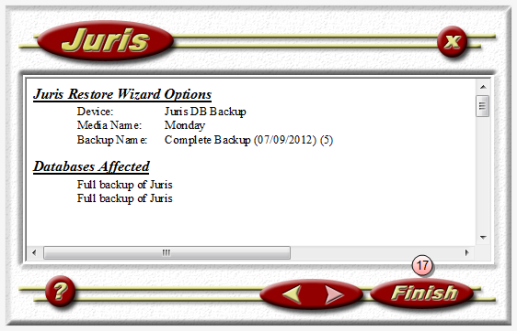
-
Click the Finish button, to start the restore.
-
Click the X button, to close the Juris Management Objects window.
When the restore is finished, you receive notification via a report in the Juris Management Objects window.