Create, Edit or Delete an Office
Create a new Office
-
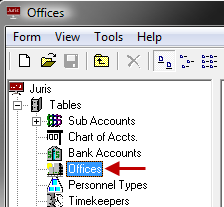
Select Tables > Offices.
-
Open a new Office form by using any of the following options:
- Click the New icon on the toolbar.
- Select Form > New from the menu.
- Use the keystroke shortcut Ctrl + N.
An Offices window opens.

-
In the Office Code text box, type a 1-4 character code.
The code can be digits, alpha characters, or a combination of both.
- In the Description text box, type a 1 - 30 character description.
-
Enter the appropriate information on the Address tab, G/L Account Tab, Fee/Exp Account tab, Tax Method Tab, Tax 1 Tab, Tax 2 Tab and Tax 3 Tab. You can click on the tabs directly or use the arrow button located at the bottom of the form.
NOTE: The city, state and ZIP information on the Address tab should be entered on one line in the format: City, ST 12345
-
Spell check the form using any of the following options:
- Click the Spell Check button on the toolbar.
- Select Form > Spelling from the menu.
- Use the keystroke shortcut F7.
-
Save the Office using any of the following options:
- Click the Save icon on the toolbar.
- Select Form > Save from the menu.
- Use the keystroke shortcut Ctrl + S.
Edit an Existing Office
- Open Tables > Offices.
- Open the existing Office using any of the following methods:
- Double-click the icon or description for the office that must be edited.
- Use the arrow keys on the keyboard to move through the list and select the office that must be edited, then press the Enter key.
-
Make any necessary modifications desired to the description or to the Address tab, G/L Account Tab, Fee/Exp Account tab, Tax Method Tab, Tax 1 Tab, Tax 2 Tab or Tax 3 Tab.
NOTE: The system will not allow the code to be changed.
-
Spell check the form using any of the following options:
- Click the Spell Check button on the toolbar.
- Select Form > Spelling from the menu.
- Use the keystroke shortcut F7.
-
Save the Office using any of the following options:
- Click the Save icon on the toolbar.
- Select Form > Save from the menu.
- Use the keystroke shortcut Ctrl + S.
Delete an Existing Office
- Select Tables > Offices.
-
Select the existing Office using any of the following methods:
- Double-click on the schedule to be deleted.
- Use the arrow keys on the keyboard to move through the list and highlight the schedule to be deleted.
-
Delete the selected Office by using any of the following options:
- Click the Delete button on the toolbar.
- Select Form > Delete from the menu.
- Use the keystroke shortcut Alt + F, D.
If the Office is referenced elsewhere in Juris, the software does not allow the Office to be deleted, and instead shows a message stating that the item may not be deleted. Otherwise, the system prompts "Are you sure you want to delete this item?"
-
Click Yes or press the Enter key to proceed with deletion.
Click No, or tab to the No button and press Enter to cancel.