Deactivate a Vendor
To deactivate a vendor's account, you have to select the vendor in question and set their account to an "inactive" state. To inactivate a vendor, select “No Purchases”. The vendor will not be available for lookup from the voucher or check writing areas. If you type in the vendor number, Juris will tell you that the vendor is not allowed to be used.
NOTE: If a vendor account has un-posted vouchers, posted but unpaid vouchers, or is assigned to a template, it cannot be set to inactive.
To deactivate a vendor:
-
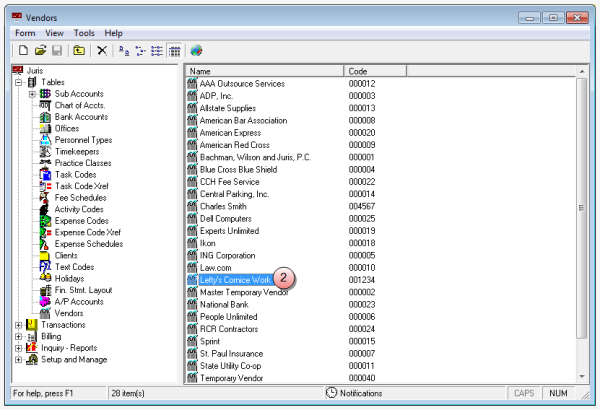
Select Tables > Vendor to open a list of vendors on the right.

-
Double-click on the vendor you want to deactivate to open that vendor's account.

-
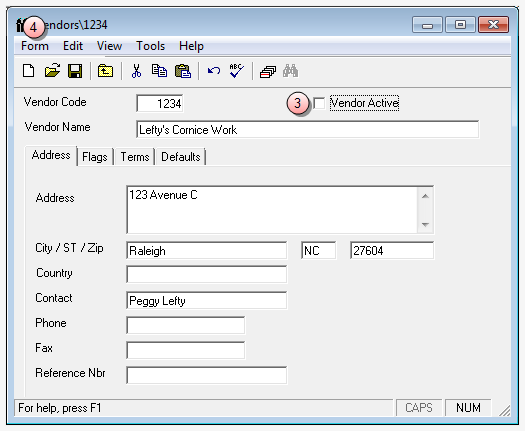
Click on the Vendor Active check box to remove the check mark.
No check mark indicates that the vendor is not active (deactivated/inactive).
-
Select Form > Save from the menu.
The vendor's account is deactivated. To reactivate a vendor, create a new vendor as outlined above and enter the vendor's original Vendor Code. The boxes in the new vendor window are then automatically filled in. To create a new vendor, see Create a vendor.
TIP: You can use 'Vendor Reports' to show which vendors are marked as inactive. Located under the Inquiry-Reports > Reports > Master Lists >Vendor Master List. Ensure that the 'Include Inactive Vendors' check box is checked (selected) when running the report.