Print Statements
The Print Statements function is designed to send reminders to clients with outstanding A/R Balances. The Print Statements function does not select any fees or expenses that may have been posted since the last bill. It shows the outstanding balance for the matter or consolidation and any payments or adjustments that may have been made since the last bill.
To Print Statements, perform the following:
- Double-click Billing.
-
Double-click the Print Statements icon in the right pane.
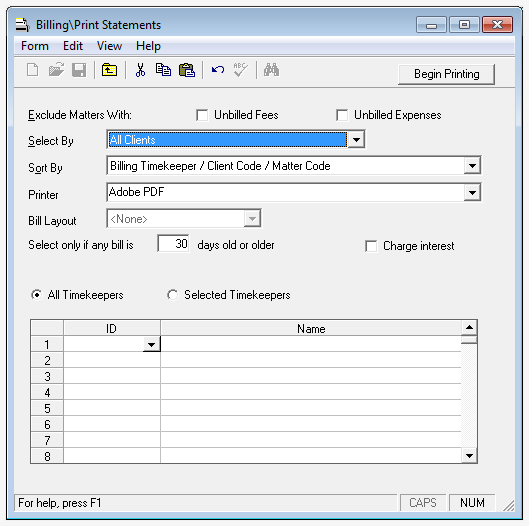
The Billing\Print Statements window opens.
-
1. Optionally, click on the Exclude Matters With option(s) you want to include on this bill. A check in the check box indicates that the option is selected.
-
Select Unbilled Fees to exclude any matter with unbilled fees.
- Select Unbilled Expenses to exclude any matter with unbilled expenses.
-
-
Click the Select By arrow and select the criteria you want to use. Options are:
- All Clientsto include all clients.
- Client/All Mattersto include all matters for a specific client or clients.
- Consolidation Name OR Matter to include all clients based on consolidation names or matter.
-
Click the Sort By arrow and select the sorting criteria option. Options are:
- Billing Timekeeper/Client Code/Matter Code
- Billing Timekeeper/Client Nickname/Matter Nicknameto include all matters for a specific client or clients.
- Click the Printer arrow and select where to print the statements.
-
Click the Bill Layout arrow and select the layout to use for these statements.
NOTE: Only bill layouts with an A/R Statement designed are available in the Bill Layout list.
-
In the Select only if any bill is ____ days old or older box, type the number of days you want to use.
NOTE: The number of days criteria merely determines which clients/matters/consolidations are to be selected for statements. The statement will include ALL A/R for the clients/matters/consolidations that fall within the range. The system does not limit the statement to only the A/R balances that exceed the minimum days old as defined by the user. For example, statements are selected for any bill that is 60 days or older. Client 1000 has an outstanding balance of $1234.56 on bill number 888 that is 60 days old, and also has an outstanding balance of $5678.99 on invoice 999 that is only 30 days old. The statement selected lists both invoice 888 and 999 showing a total of $6913.55 outstanding.
- Optionally, click the Charge interest check box, if you want the system to add interest to the statements that are past due.
-
Follow the steps below that correspond to the 'Select By' option you chose in step 4.
If you chose All Clients as your 'Select By' option, you can select to include Matters who have Accounts Receivable where the Billing Timekeeper is “All Timekeepers” or you can choose one or more specific billing timekeepers.
 All Timekeepers
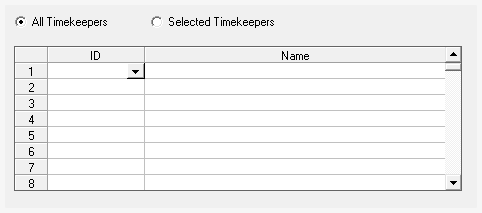
- Click the All Timekeepers option to select it.
 Select Timekeepers
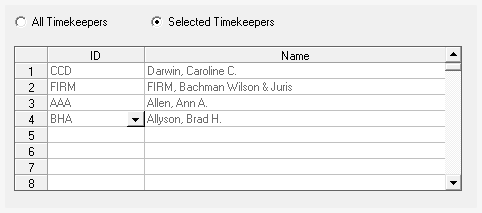
- Click the Selected Timekeepers option to select it.
- In the first ID cell, type the timekeeper code for a timekeeper whose matters you want to include, or click the arrow to select the timekeeper from a list.
- Repeat the above step for each timekeeper you need to include.
If you chose Client/All Matters as your 'Select By' option:
 Follow these steps
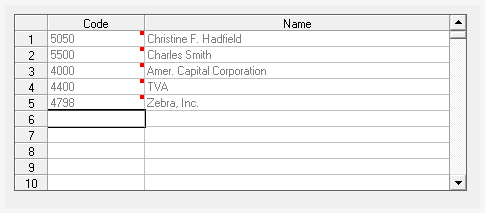
- In the first Code cell, type the client code, or click the Find button to open the Client/Matter Finder window to search for and select the client. The Name cell automatically populates with the information associated with the client code.
- Repeat the above step for each client you need to include.
If you chose Consolidation Name OR Matter as your 'Select By' option, you can select to include work for specific consolidations OR for specific client/matters.
 Consolidation Name
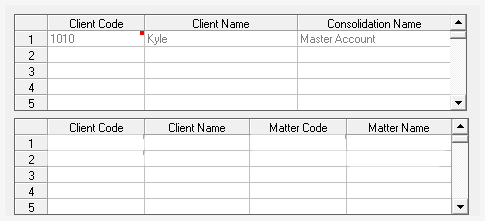
- In the first Client Code cell, type the client code, or click the Find button to open the Client/Matter Finder window to search for and select the client. The Client Name cell automatically populates with the information associated with the client code.
- Click the Consolidation Name arrow to select the consolidation name.
- Repeat steps a and b for each client and consolidation name you need to include.
 Matter Name
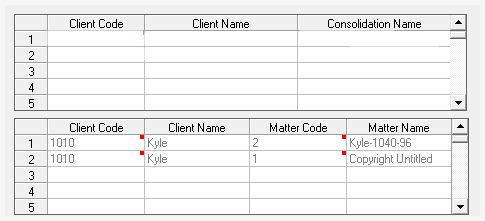
- In the first Client Code cell, type the client code, or click the Find button to open the Client/Matter Finder window to search for and select the client. The Client Name cell automatically populates with the information associated with the client code.
- Click the Matter Code cell, type the client matter code, or click the Find button to open the Client/Matter Finder window to search for and select the client matter. The Matter Name cell automatically populates with the information associated with the matter.
- Repeat steps a and b for each client and matter name you need to include.
-
Follow the steps below that correspond to the 'Select By' option you chose in step 4.
If you chose All Clients as your 'Select By' option, you can select to include any Matters who have Accounts Receivable by a specific billing timekeeper or all billing timekeepers, or by specific billing timekeepers.
 All Timekeepers

- Click the All Timekeepers option to select it.
 Select Timekeepers

- Click the Selected Timekeepers option to select it.
- In the first ID cell, type the timekeeper code for a timekeeper whose work you want to include, or click the arrow to select the timekeeper from a list.
- Repeat the above step for each timekeeper you need to include.
If you chose Client/All Matters as your 'Select By' option:
 Follow these steps

- In the first Code cell, type the client code, or click the Find button to open the Client/Matter Finder window to search for and select the client. The Name cell automatically populates with the information associated with the client code.
- Repeat the above step for each client you need to include.
If you chose Consolidation Name OR Matter as your 'Select By' option, you can select to include work for specific consolidations OR for specific client/matters.
 Consolidation Name

- In the first Client Code cell, type the client code, or click the Find button to open the Client/Matter Finder window to search for and select the client. The Client Name cell automatically populates with the information associated with the client code.
- Click the Consolidation Name arrow to select the consolidation name.
- Repeat steps a and b for each client and consolidation name you need to include.
 Matter Name

- In the first Client Code cell, type the client code, or click the Find button to open the Client/Matter Finder window to search for and select the client. The Client Name cell automatically populates with the information associated with the client code.
- Click the Matter Code cell, type the client matter code, or click the Find button to open the Client/Matter Finder window to search for and select the client matter. The Matter Name cell automatically populates with the information associated with the matter.
- Repeat steps a and b for each client and matter name you need to include.
- Click Begin Print when you are finished selecting your criteria to start the print statement process.