Manually Select Checks
To manually select checks:
- Select Transactions > Checks.
-
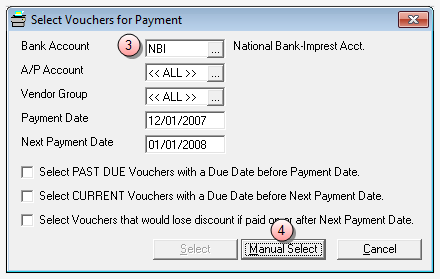
Select Form > New > Check Printing to open the Select Vouchers for Payment window.
-
In the Bank Account box, type the account code of the bank from which checks are to be drawn (or click the ellipses button to select it from a listing).
NOTE: A bank account code is required.
-
Click the Manual Select button to go to the Checks window.
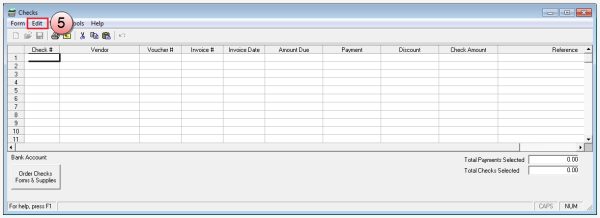
From here, you are ready to add your voucher(s).
-
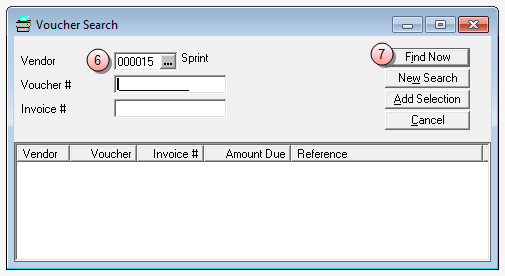
Select Edit > Add Voucher from the menu to open the Voucher Search window.
-
Enter one, or more, of the following to use as your search criteria.
- In the Vendor box, type the vendor code. Alternatively, you can click the ellipses button to search for the vendor code. See Vendor lookup from Checks below for more details.
- In the Voucher # box, type the voucher number.
- In the Invoice # box, type the invoice number associated with the voucher.
-
Click the Find Now button.
A list of vouchers matching your search criteria is displayed.
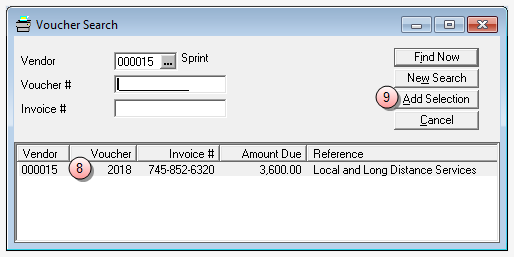
- Click on the voucher in the list that you want to select.
-
Click the Add Selection button to add that voucher to the list.
The voucher is added to the list in the Check window.
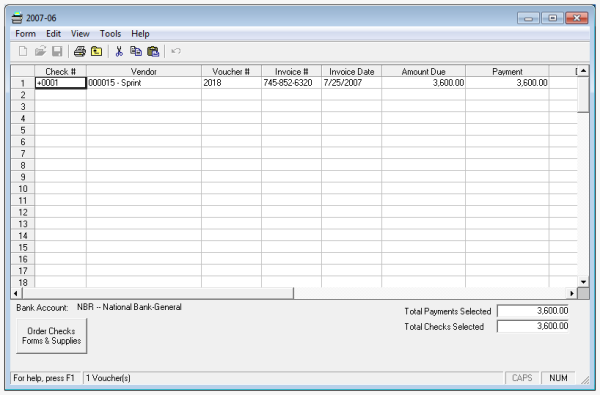
NOTE: Only positive vouchers may be added in this manner. See Negative Vouchers for details on how to select negative vouchers.
TIP: Alternatively, you can create a "Temporary Vendor" by using Vendor Lookup.
-
Repeat these steps 5 through 9 for each voucher you need to add to the Check list.
Once checks are selected, they are ready for printing and posting. For details on printing and posting checks, see Print/Post Checks.