Advanced Restore
Caution: The advanced restore function is not compatible with SQL 2008 and SQL Express 2008.
Caution: It is recommended that the Advanced Restore be used after discussion with a Juris Technical Support representative.
The Advanced Restore function is utilized when a Juris database is to be restored to different database.
You will find the Juris Advanced Restore Wizard in the Juris Management Console. The console is installed on the administrative workstation(s). To open the console, click Start > Programs > Juris > Juris Management Console or you may execute the JurisManagementConsole.msc file which is located in the C:\Program Files\ Juris\bin directory.
To use the Advanced Restore function, perform the following:
- Right click on the appropriate Database folder in the tree (left) side
of the window and select All Tasks>Restore. See Figure 1.0
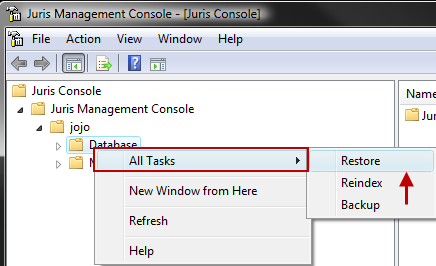 Figure 1.0
- Browse to a backup by clicking the ellipses button. Select the drive where the backup resides and click the OK button. See Figure 2.0
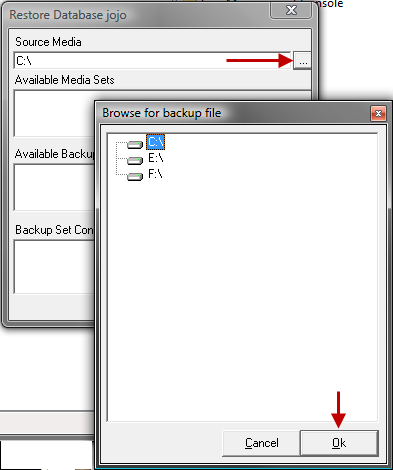 Figure 2.0
- Browse for the backup file. Highlight the file and click the Ok button. See Figure 3.0
Note: Remember that the backup file has a .bak file extension.
Figure 3.0
- Once the backup data has been selected, Available Media Sets are listed
in connection with that Media. Check the appropriate Media Set and the
list of appropriate Backup Sets for that Media Set are listed. Check the
appropriate Backup Set to be restored and the files to be restored will
be listed for confirmation. Click the OK button to restore the data. See Figure 4.0
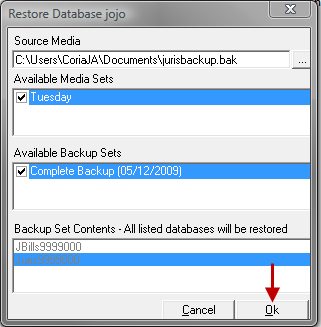 Figure 4.0
- If data already exists for the same company, you will see a message box stating that the database already exists and this operation will overwrite existing databases. To continue, click the Yes button. Another warning will state that the selected media does not belong to this company. To continue, click the Yes button. The Management Console will begin restoring the selected database. Once the restoring process is complete, you can log into the restored database.
- If data is not already in place for the same company, you will receive a message stating that the selected media does not exist for this company. If you want to continue, click the Yes button. Then you will be asked to select the location to place the new data files. Either accept the default location or select a new one in the Browse window. The Management Console will begin restoring the selected database. Once the restoring process is complete, you can log into the restored database.