Create a Check Design
To create a check design:
-
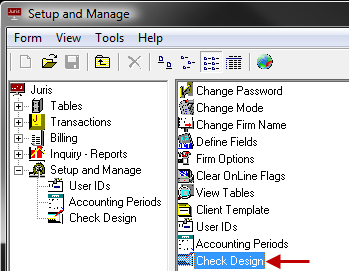
Double-click Setup and Manage.
-
Double-click Check Design.
-
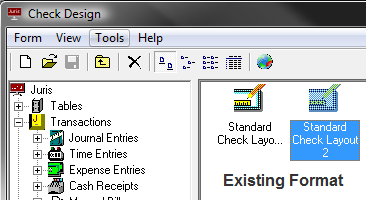
Create a new check layout by clicking the New icon, or open an existing format for modification by double-clicking on the format name.
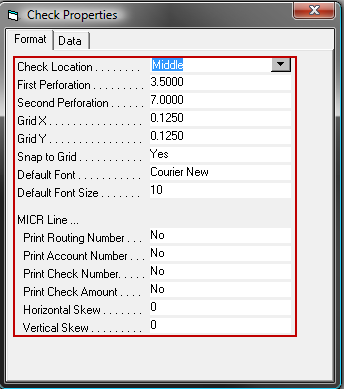
The Check Properties screen appears.
-
Notice that the check layout canvas has 3 sections, with an area in the bottom of the middle section that is reserved for MICR information. Right click anywhere in the grey area of the check and select properties to move the Check Location to top, middle or bottom - which will change the location of the MICR information. This location is also where the perforation settings and MICR information may be supplied, as well as other options. See Check Design Advanced Topics for details on these settings.
Note
MICR information may be printed on the checks, but this should only be done if the appropriate equipment, font, and magnetic ink required for printing MICR information are available.
-
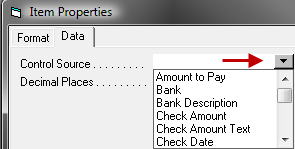
Add data fields by clicking the Insert Data Field button, then drawing the field in the canvas. Right-click on the field and go to properties. On the Data tab, select the data to be displayed from the drop-down menu on the Control Source field.

-
Add label fields by clicking the Insert Text Field button, then drawing the field in the canvas. Double click on the field and type in the text desired in the label.
-
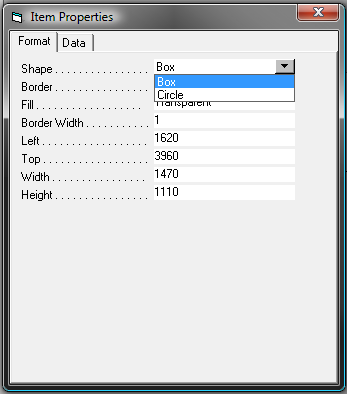
Add a shape by clicking the Insert Shape button, then drawing the field in the canvas. On the Format tab, select the shape to be displayed from the drop-down menu on the Shape field.
-
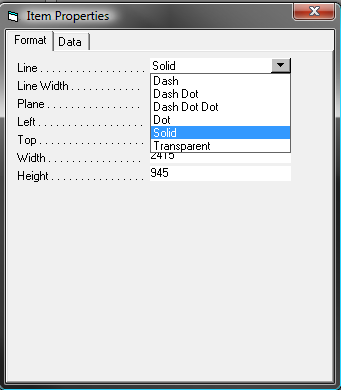
Add a line by clicking the Insert Line button.
Note
Fields, lines and shapes can be rearranged by clicking and dragging. Use the other property values to adjust orientation, appearance, dimensions, etc.
-
When satisfied, Save the format using any of the following options:
- Click the Save icon.
- Select Form > Save from the toolbar.
- Use the keystroke shortcut Ctrl + S.