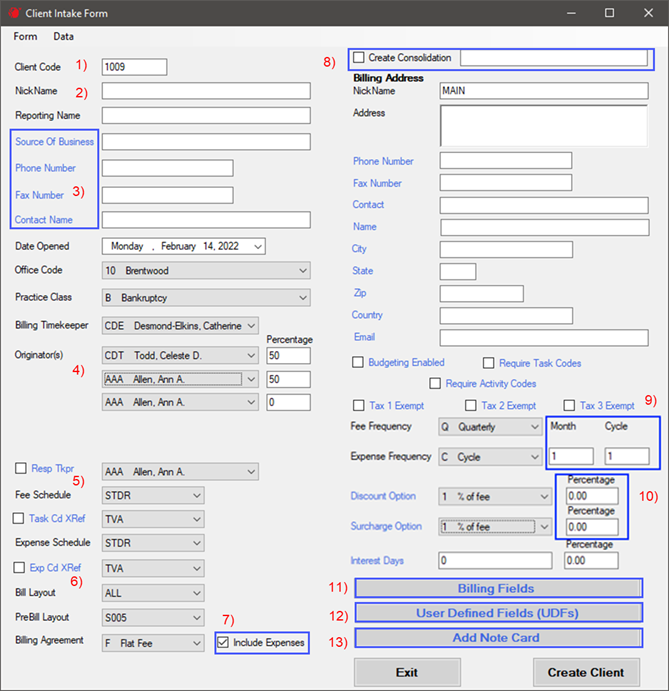
Client Intake Form
Adding a new client from this module allows you to enter information from a single form instead of switching from screen to screen in Juris. You can use defaults values to auto-populate fields, making data entry more efficient.
NOTE: Within the form, required fields display labels with black font. Optional fields show in blue font.
-
As you complete the Client Intake form, review field values that auto populated from default template or the chosen template and keep the following in mind:
-
Client Code – If your company uses numeric codes, the next available number will prepopulate. If your company uses an alpha-numeric code, you need to enter the appropriate code. The code will be validated to confirm it is not a duplicate and that it follows your formatting and character limitations.
-
Nick Name – The Reporting name auto-populates from this value.
-
Fields in Blue – You do not need to complete these fields to save the client record, but this information may be a business requirement.
-
Originator(s) and Percentage– Choose the originator(s) from the list and specify the percentage for each. The total must equal 100. You cannot have the same originator twice with a non-zero percentage. Any originator showing a zero (0) percent is ignored during client creation.
-
For fields with check boxes next to drop-down lists, such as the Resp Tkpr field, you can mark the box to activate the field, then make the appropriate selection from the list. If the check box is not marked, the default value showing in the list is not saved to the client record.
-
The Xref drop downs can only be selected if your firm has added the appropriate xRef types in Juris. See Task Code XRef Overview to learn more.
-
Billing Agreement – If Retainer or Flat Fee is selected, the related fields for the Billing Agreement will display.
-
Create Consolidation – If the check box is marked, the Consolidation data that is entered can be established for the client and assigned to matters.
-
Fee Frequency and Expense Frequency - If Quarterly, Annual or Semi Annual are selected, the Month box appears. If Cycle is selected, then Cycle appears. See Billing Frequencies to learn more.
-
Discount and Surcharge Percentage – These fields are hidden unless they have been set up in Firm Options in Juris.
-
Client Billing Fields – Click the button to define client billing fields if custom billing fields have been configured in your Juris database. The form changes depending on how many billing fields you have defined.
-
User Defined Fields (UDFs) – If UDFs have been configured in your Juris database, click the button to define UDFs.
-
Add Note Card – You can add one text notecard while creating a new client. Enter text directly into the Add Client Note Card popup screen to record a notecard, then click Add Note Card to save the data.
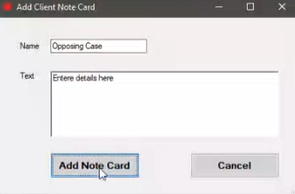
See Note Cards
-
-
When you have completed the form, click Create Client. The data is verified.
-
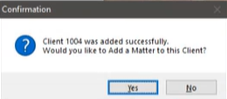
If no issues are found, the client is added.
-
If any problems are detected, a prompt displays you to indicate the problem(s) so that you can fix them.
-
-
After the client is successfully added, you are given the option to add a matter for the client.
-
If you select Yes, the Matter Intake Form opens.
-
If you select No, the Client Intake Form refreshes so that you can add another new client.
-
Related Topics