Backing Up Your Databases Using SQL Server 2014
You need to use Microsoft SQL Server Management Studio to back up for two Juris system databases: Juris and JBills.
Note
You can also use the Juris Management Console to back up your databases. For more information, see Back up and restore Juris SQL database.
This procedure describes how to perform these backups using only SQL Server 2014.
Note
All screen shots in the following procedures are shown on Windows Server 2014 R2. If you are using a different, supported operating system, the appearance of SQL Server Management Studio may vary slightly.
If you are using SQL Server 2008 or 2012, see Backing Up Your Databases Using SQL Server 2008 / 2012 for complete instructions.
Backing Up the Juris Database
The procedure for backing up the Juris database involves accessing SQL Server Management Studio and specifying backup options such as the set name, backup location, and backup file name.
- Verify that all users have closed the Juris client application.
- Verify that you are logged into the computer that is running SQL Server, and that you are the administrator or a user with administrative privileges.
- Open SQL Server Management Studio using one of the following methods, based on your operating system:
- Windows Server 2008: Click Start, click All Programs, click Microsoft SQL Server, and click SQL Server Management Studio.
- Windows 8 / Server 2012: Search for SQL Server, and click SQL Server Management Studio in the search results.
-
On the Connect to Server dialog box, specify your credentials and click Connect.
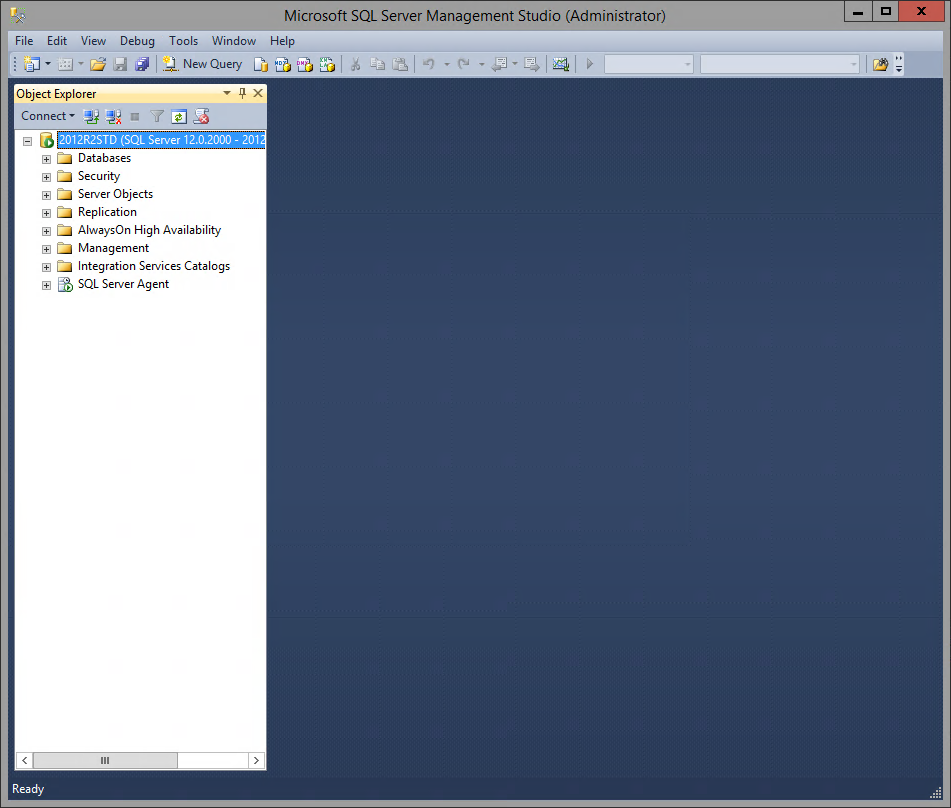
The Microsoft SQL Server Management Studio dialog box appears.
-
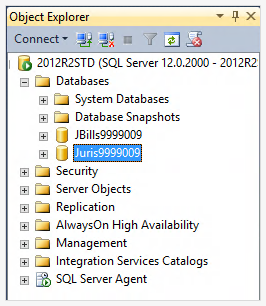
On the left side of the dialog box, click the + icon adjacent to the Databases node.
Two Juris-related entries should be listed: Juris and JBills. Each name is appended with your client code (as specified during your Juris installation).
-
Right-click the Juris database, and click Tasks / Back Up.
The Back Up Database - Juris dialog box appears.

- In the Source area on the right side of the dialog box, select the Juris database from the Database drop-down list.
- From the Backup type drop-down list, verify that Full is selected.
- Verify that Backup component is set to Database.
- In the Destination area, verify that Disk is selected from the Back up to drop-down list.
-
Click the Add button.
The Select Backup Destination dialog box appears, which allows you to specify the name of the database backup file or a predefined backup device.
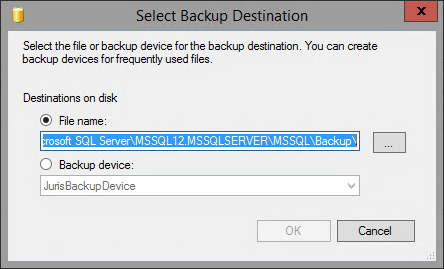
- If you are specifying a backup file, you need to navigate to the appropriate location and specify a file name.
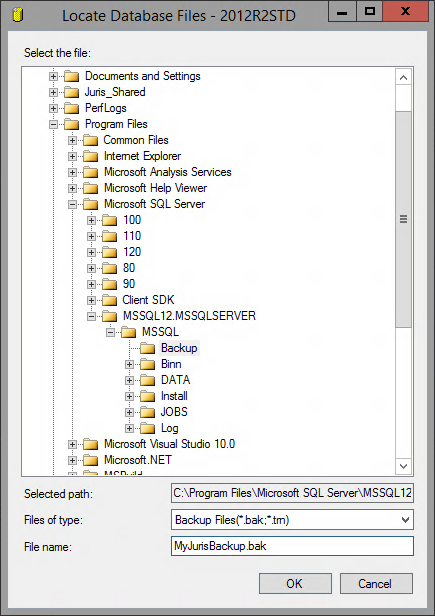
Click the ... button adjacent to the to the File name text box.
The Locate Database Files dialog box appears.
- Navigate to the appropriate location and click the folder that will contain your backup.
In the File name text box, enter the name and file extension of the database backup file that will be created when the backup is executed.
Caution
You need to manually specify the file extension (.bak). For example: MyJurisBackup.bak
Your dialog box should appear similar to the following example.
Click OK.
You are returned to the Select Backup Destination dialog box, and the file name you specified appears in the File name text box.
-
If you are specifying a backup device, you need to select it.
- Click Backup device.
-
Select the predefined backup device from the corresponding drop-down list.
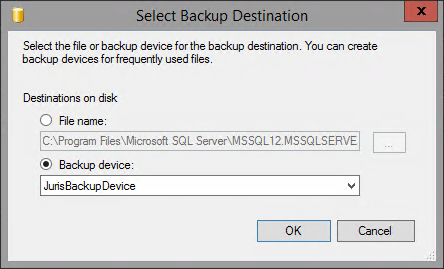
For more information on creating backup devices, see Creating a New SQL Server Backup Device.
-
Click OK to close the Select Backup Destination dialog box.
You are returned to the Back Up Database dialog box, and the new backup file or backup device is now listed in the large text box in the Destination area.
-
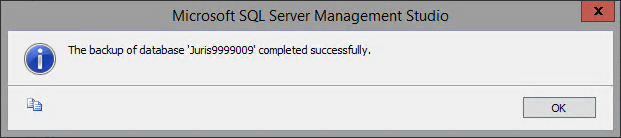
Click OK.
The database backup is executed, and the success message appears.
-
Click OK to close the success message dialog box.
You are returned to the main Microsoft SQL Server Management Studio dialog box. Now you need to backup the other database - JBills.
- Proceed to Backing Up the JBills Database below.
Backing Up the JBills Database
The procedure for backing up the other Juris system database, JBills, is very similar to the procedure used for the Juris database. However, instead of defining a backup destination (and file) or backup device, the JBills database backup should be added to the destination previously created for the Juris database.
-
Right-click the JBills database, and click Tasks / Back Up.
The Back Up Database - JBills dialog box appears.
- In the Source area on the right side of the dialog box, verify that the JBills database is selected from the Database drop-down list.
- From the Backup type drop-down list, verify that Full is selected.
- Verify that Backup component is set to Database.
-
In the Destination area (lower portion of the right side of the dialog box), click the destination previously defined when creating the Juris database backup.
This action adds the JBills database backup to the same backup file as the Juris database backup.
-
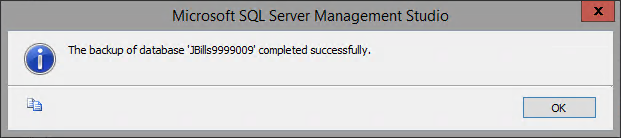
Click OK.
The database backup is executed, and the success message appears.
-
Click OK to close the success message dialog box.
You are returned to the main Microsoft SQL Server Management Studio dialog box, and the entire database backup process is complete.
- Proceed to Verifying Backup File Contents below.
Verifying Backup File Contents
Once you have backed up both the Juris and JBills databases, it is recommended that you view the contents of the backup file to verify that both databases are listed.
-
On the Databases node, right-click either of the two databases (Juris or JBills), and click Tasks / Back Up.
The Back Up Database dialog box appears.
- In the Destination area, verify that the destination used for the Juris and JBills database backup is selected (highlighted).
-
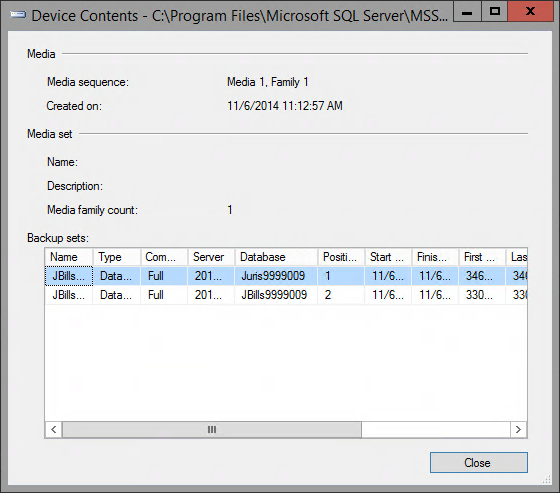
Click the Contents button.
The Device Contents dialog box appears.
-
Verify that both the Juris and JBills databases appear in the Database column, as shown above.
- Click Close to return to the Back Up Database dialog box.
- Click Cancel.
- Close Microsoft SQL Server Management Studio.