Refund a Trust Deposit
If you need to refund trust money to a client, you create a quick check.
To refund a trust deposit:
-
Start Juris and log in to open the main Juris window.
-
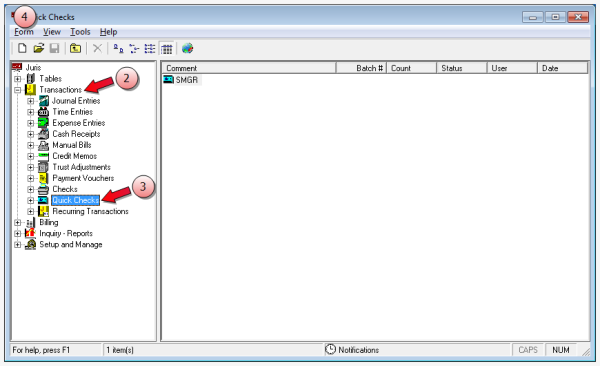
Double-click Transactions to expand the folder.
-
Click Quick Checks.
TIP: Quick Checks allows you to enter a check and a voucher simultaneously.
-
Select Form > New > Quick Check on the menu to open a new batch window.
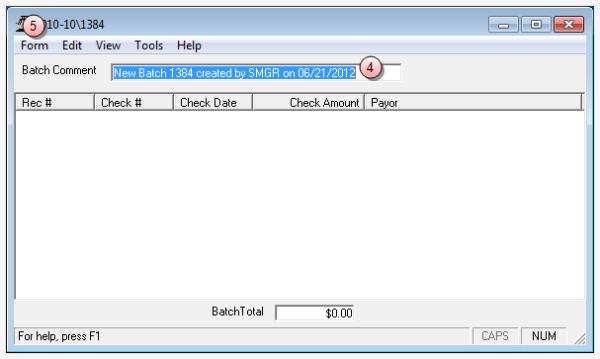
- In the Batch Comment box, type a name for this batch, or skip this step to accept the default.
-
Select Form > New on the menu to open the Quick Check window.
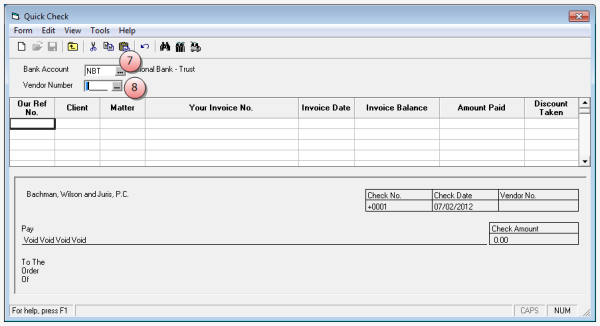
- In the Bank Account box, type the trust account in which the client's funds were deposited, or click the ... (ellipses) button to select the trust account from a list.
-
In the Vendor Number box, do one of the following:
- If a vendor account has been setup for the client, type that account vendor code in the box.
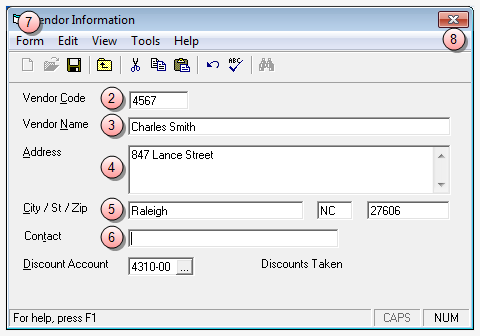
Remember to verify that the vendor is not setup to receive a 1099 form before completing the process, as Trust refunds should not be reported on a 1099. - If a vendor account has not been setup for the client, add a vendor account for the client, and then continue with step 9 below.
The 'Vendor Number' box on the quick check is automatically populated with the vendor code from the account you setup for the client.
- If a vendor account has been setup for the client, type that account vendor code in the box.
-
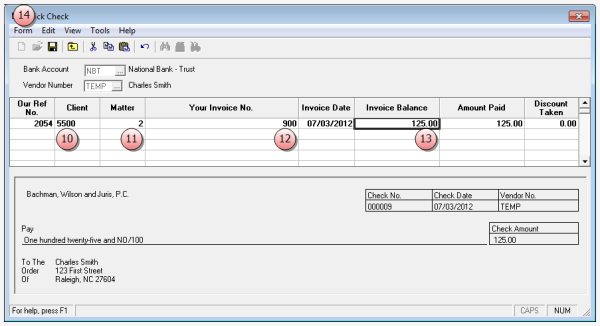
Select Form > New on the menu to allow input in the rows.
-
Select Form > New on the menu to allow input in the rows.
-
In the Client column, type the number of the client whose trust deposit is being refunded.
-
In the Matter column, type the matter number to which the refund applies.
-
In the Your Invoice No. box, type an invoice number.
-
In the Invoice Balance box, type the amount to be refunded to the client.
The 'Amount Paid' column is automatically populated with the amount you entered in the 'Invoice Balance' column.
-
Select Form > Save on the menu.
A Check Printing window opens.
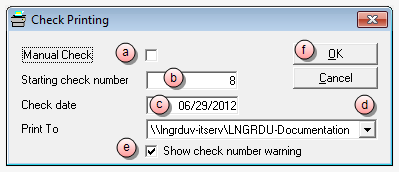
- Optionally, select the Manual Check check box, if you intend to hand-write a check. Ensure that the check box is NOT selected in you intend to print the check.
- In the Check Number box, verify that the starting check number is correct, or if hand-writing a check, type in the check number.
- In the Check date box, type a date, or use the default (today's date.)
- Click the Print To arrow to select the printer where you want to print the check.
- Ensure that the Show check number warning check box is selected, if you want the system to warn you if the starting check number is out of sequence.
- Click OK.
NOTE: If you are printing the check(s), ensure that you have check stock in the selected printer before you click the OK button, as the check(s) start printing immediately.
-
Click the Close button on the Quick Check window.
-
Remember to send the check to the client.
Warning: Do not use a temporary vendor for trust refunds. Instead, create a vendor account for the client.
